
Neverwinter Wizard Build: Thaumaturge DPS Setup Guide
Our Neverwinter wizard build covers the Thaumaturge rotation, powers, mounts, companions and gear progression so you hit max damage in every boss fight.
Jump to

Why the Thaumaturge Is the Wizard to Play
Wizards are a pure DPS class. At level 11 you choose between two damage paragons, and neither can tank or heal. This Neverwinter wizard build focuses on the Thaumaturge, the elemental path that mixes fire and ice and hits hard on single targets, which is what endgame DPS checks demand. The Arcanist is the other paragon and is built around arcane and lightning magic.
The setup below follows the max-damage Thaumaturge configurations used in Module 32 (The Soul Collector) and Module 33 (Biting Cold). Gear notes include Module 34, Sleeping Gods Lie, which went live November 17, 2026. Intelligence is the wizard's primary ability score, and Wisdom and Charisma are the secondaries.
Plan for two loadouts:
- Single target for bosses. This is where most of your effort should go.
- Multi-target for trash packs. Swap to it when the tank is pulling groups together.
Official page: Neverwinter (playneverwinter.com)
Core Mechanics You Need to Understand
The Thaumaturge's damage comes from three stacking systems. If you understand how they interact, the rotation makes sense.
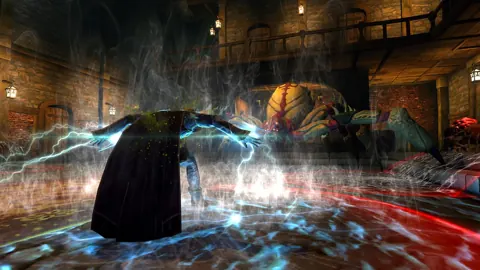
 Image: Steam / Cryptic Studios
| Mechanic | What it does |
|---|---|
| Arcane Mastery | Arcane spells add stacks, up to 5. Each stack gives +0.5% Arcane damage for 8 seconds and lengthens Entangling Force's hold. |
| Arcane Presence | Arcane Mastery stacks also boost your Cold, Fire and Lightning damage by 0.5% each. |
| Chill | Cold spells stack Chill up to 6 times. Some powers freeze targets at max stacks. |
| Smolder | Fire powers apply a damage-over-time burn. On a Chilled target it becomes Rimefire, and Chill effects can refresh it. |
| Rimefire Weaving | Smolder or Chill reduces the target's damage resistance against you by 5%. Rimefire raises that to 10%. |
| Spell Mastery | The Tab slot holds an extra encounter power that deals 10% more damage. |
Magic Missile is the main stack builder. Its third cast strikes three times, so a full Magic Missile chain quickly takes you to five Arcane Mastery stacks.
Single-Target Powers and Rotation
 Image: www.playneverwinter.com
Power Setup
| Slot | Power | Role |
|---|---|---|
| At-Will | Magic Missile | Builds Arcane Mastery stacks |
| At-Will | Chilling Cloud or Ray of Frost | Filler damage |
| Encounter | Icy Rays | Burst. It hits harder when both beams land on one target |
| Encounter | Entangling Force | Burst that scales with Arcane Mastery |
| Encounter | Chill Strike | Fast icicle, 15-second cooldown |
| Encounter | Repel | Forceful blast; open with it to squeeze extra casts into the artifact window |
Chilling Cloud gives slightly more damage. Ray of Frost costs you about half a percent of damage but reliably brings your daily back for every boss rotation. If your daily keeps coming up late, take Ray of Frost.
The Rotation
- Get combat advantage first. The arc under your target should be purple, not white, before you start casting.
- Build five Arcane Mastery stacks with Magic Missile so that Entangling Force hits with the full bonus.
- When the group calls the artifact window, cast in this order: artifact → Icy Rays → Entangling Force → Chill Strike → Repel → belt item → daily → mount combat power → Repel → Chill Strike → Entangling Force → Icy Rays.
- Outside that window, keep attacking, use encounters as they come up, hold five Arcane Mastery stacks, and fill the gaps with Chilling Cloud.
The artifact call is a roughly 10-second window where the whole party stacks artifacts and support mounts. Your damage can be about four times higher during it, so get two full sets of encounters in. Opening with Repel and then using the artifact can give you a third Repel. On PC with good latency this works. On console, lag makes it unreliable, so stick to the basic sequence there.
If you have a good connection, cast only the first two hits of Chilling Cloud and replace the third hit with one Magic Missile to get a little more damage.
AoE and Smolder Setups
For multi-target play, put on your AoE powers and use them on packs once the tank has grouped them up. The wizard has plenty of options:
 Image: Steam / Cryptic Studios
- Chilling Cloud: its third hit splashes Chill onto nearby enemies.
- Fireball: hits a 15' radius and applies Smolder to everything it touches.
- Fanning the Flame: a burning target damages Smoldering enemies within 15', and they damage it in return.
- Scorching Burst: a channeled fire column that grows the longer you hold it, and it Smolders everything inside.
- Furious Immolation and Arcane Singularity: dailies that pull enemies together, which is ideal for grouping trash.
Smolder Build for Master Jotunskar
For the first boss of Master Jotunskar, a Smolder-focused loadout is very effective. Use Icy Rays, put Fanning the Flame in your Spell Mastery slot, then Entangling Force and Repel, with Chilling Cloud as your at-will. Take Critical Conflagration, Swath of Destruction and Directed Flames. Directed Flames delivers 80% of Smolder's damage instantly, up to once every 12 seconds. Icy Terrain is also an option, but its cast time is awkward.
For the add waves, run Chilling Cloud and keep Icy Rays available to burst down the giants. Open on packs with your daily, then Fireball and Fanning the Flame, then use everything else.
Ability Scores and Race
- Ability scores: put everything you can into Intelligence. Add 3 points to Charisma and 3 to Dexterity.
- Race: Wood Elf is the default choice because of its Critical Strike bonus. Any race that boosts one of the five damage stats will work. Tiefling, with 5% damage against targets below half health, is a good alternative.
Mounts, Insignias and Combat Powers
Get Tactician's Precision and Cavalry's Haste as soon as possible. Their cooldown reduction makes sure your encounters are ready when the artifact call starts.
| Insignia bonus | Why it's in the stable |
|---|---|
| Tactician's Precision | Cooldown for artifact windows |
| Cavalry's Haste | More cooldown |
| Artificer's Inducement | Encounters ready on time |
| Enchanter's Hex | Damage |
| Executioner's | Stats |
Fill the slots with Skill and Brutality insignias. For your mount combat power, Demonic Gravehound at maximum magnitude is the top single-target choice. Grubshank also works, but it deals its damage over five seconds. A mount with Mystic Aura (+2250 Power and Accuracy to your party within 80') makes capping stats much easier. Ollie the Octie and Snowtusk both have it.
Companions, Enchantments, Artifacts and Boons
Companions
- Single-target bonuses: Precision (Critical Strike), Bigger They Are, Raptor (Power) and Batiri (damage against bosses).
- Multi-target swaps: Spine Devil, Neverwinter Knight for damage, and Wolf for Critical Severity.
- If your party has a Paladin running a crit aura, you can swap Precision for a support bonus.
- Your summoned companion depends on what the group needs.
- If a healer is already running Slowed Reactions, swap Perfect Vision for a vulnerability-style debuff. That gives the whole group roughly 3.5–4% more damage. If you play mostly with random groups, a selfish damage setup is acceptable, since strong personal numbers are what get you invited.
Enchantments and Artifacts
- Put damage stats in your offense slots and Garnet in utility.
- Use Lightning Flash as your combat enchantment. Swift Synergy has slightly more item level, but it costs far more and requires rebalancing your whole stat spread.
- Devil's Precision is a good overload. It works well alongside a Giant Slayer-style single-target setup.
- Primary artifact: pick one that increases the damage your target takes. The Arcanist's Hungry Hex from the current Beneath Sleeping Ice battle pass does this and also grants Power, Accuracy and Combat Advantage.
- Secondary artifacts: use the highest item level you have, ideally with damage stats.
Boons and Consumables
Take damage-stat boons. Do not run Enhanced Application in Jotunskar as a wizard. It will heal the first boss. For consumables, use Sunlord's Gifted Elixir from the Vault of Piety, watermelon and sorbet from events, a flask, your guild food, a Stone of Health, and stat-padding tools.
Gear Progression in Sleeping Gods Lie
Module 34 changed early gearing considerably. The updated queue rewards aim to get a fresh level 20 character to around 80,000 item level. The Seal of the Spider store was closed, and you can trade your old Seals of the Spider for Seals of the Dragon at a 3:1 ratio.
- Run your random queues in a premade group, either from Protector's Enclave or your guild, so you are not stuck waiting in long DPS queue times.
- Spend your Seals of the Dragon at the Seals Merchant in Protector's Enclave on gear upgrades.
- For weapons, take the new ones from the current area, complete the quests to get them on green, and upgrade them from there. Advanced trial content takes them further, and master trial content takes them to their highest tier.
Two more tips:
- Pick up the Astral Raider sleeves from Zoraxian invasions in Wildspace. They give a large multiplicative damage bonus in scaled content, which covers most queues below Master. Swap to your real arm piece only for Master.
- The Demon Lord's Immortality neck and waist, combined with the Shard of Orcus's Wand artifact, give up to a 10% damage bonus. You can get them from Demogorgon drops or the auction house.
The Madness of the Sleeping God zone mechanic gives Chaotic Flux, which unlocks new statistics on your gear or attempts to raise a statistic's value. If an attempt fails, you keep your highest value. Put those attempts into damage stats first.
Continue with
 Neverwinter Barbarian Build: Blademaster Rotation & GearOur Neverwinter barbarian build covers Blademaster powers, feats, the artifact call rotation, gear progression, mounts and companions to max your damage.
More in Builds

Neverwinter Fighter Tank Build: Vanguard Gear and Powers
Build a durable Vanguard with this Neverwinter fighter tank build: powers, feats, Dig In blocking, enchantments, mounts and debuff swaps for endgame runs.
Neverwinter Ranger Build: Hunter DPS Powers, Feats & Gear
Our Neverwinter ranger build covers Hunter DPS powers, feats, stat priority, rotation and gearing, plus a Warden option. Set up your ranger and hit harder.

Neverwinter Rogue Build: Whisperknife DPS Setup Guide
Our Neverwinter rogue build covers Whisperknife single-target and AoE rotations, stats, gear, mounts and companions. Discover how to top the damage charts.

Neverwinter Warlock Build: Hellbringer DPS Powers and Gear
Our Neverwinter warlock build covers Hellbringer single-target and AoE power setups, feats, class features, gear, companions, and mounts for M33.5 DPS.
Join the community
Official channels for news, updates and player help: